Thursday, January 11, 2018

How to motivate yourself to save money by this creative coin saver

Creative Coin Saver for Ipon Challenge


All photos are credited to their respective owners

It may be ironic to buy new or another piggy bank just to save money, you get my point right. But the thing is, this coin saver was presented in a timely manner when Peso sense uploaded its ipon challenge photo on how you can save money. it is encouraging to comply with it because the photo was highly organized and indicates how much you will save after the year ends. It is truly the right place at the right time since January is the first month of the year.

Almost I myself wanting to save money since New Year means new or fresh, It’s a new me! Oh come on’ let’s forget how we spend spree last year. Let’s start the year doing the right thing for our future.

The seller told her future buyers that this coin saver was unlike the typical DIY can saver in which can easily be opened. Meaning, this coin saver was purposely made to save.

Fair warning: keep it out of reach to children.

This photo is from a well-known Hachi’s online buy and sell group posted by Ms. Eloisa Pagaduan at a price of 90 pesos only!, she captioned this to her post:

As per Ms. Eloisa the minimum placement of order is two (2) pieces.

“kung tinatamad kang gumawa ng alkansya/Mag paprint nung papel bili ka nalang neto.
90 pesos lang to bes. (minimum of 2pcs)
Sa mga gustong mag ipon dyan. May naka lagay na na paper dito na ishi shade nyo nalang kung anong amount nilagay nyo at kung ilan Pag nakumpleto mo to bes may 53,750 kana pwede rin namang sumobra bsta marunong kang mag tupi ng pera at kakasya sa alkansya
order na bes.
anonas/Sikatuna meetup.
1 week to bes kase made to order.
Payment first po.”

You can personally message her via facebook account: @EloisaGrande Pagaduan

The photo that was glued outside the can saver was made famous by Peso Sense Ipon Challenge and can be downloaded for free

for your convenience here’s the image made by Peso Sense.


Just an honest advice lets not just buy one, the real essence here is that we also need an action and discipline is the key to success. Lets make this happen! Aja!

Wednesday, January 3, 2018

MAYBELLINE’S BABY SKIN PORE ERASER – BABY SMOOTH SKIN (A Review)

Before the year 2017 ended, I have received one of my wishlist – a PRIMER!! Women who loves to wear make up knows that it is one of the the most important thing you must put on your face before putting any make up. I usually skip this method until I have watched several Youtube tutorial and they’ve poured me with “PRIMER IS A MUST”. I cried. LOL. I have never tried any primer bafore, so this is my first time. My sister gave me a Maybelline’s baby skin pore eraser. She bought it at watsons with me at a price of Php 250.00 for a 22ml. (Why are primers so pricey? Huhu)

maybelline baby skin pore erasermaybelline baby skin pore eraser01


PACKAGING:

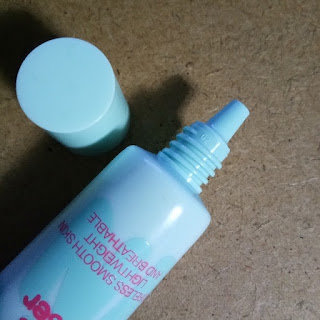
   I like how cute it looks with its bluish/greenish tube conatainer. In it’s packaging, it includes instruction and they claimed that its secret iingredient is the cherry extracts.

maybelline baby skin pore eraser02

It Claimed To Give You:

  • PORELESS SMOOTH SKIN
  •  LIGHTWEIGHT FEELING
  • SKIN IS SHIN FREE AND EVEN ALL DAY
  • and it’s BREATHABLE


What’s Inside?

As you can see in the photo below, it has this thick and translucent gel consistency. Smells like a baby powder and when I started putting it in my skin, it felt very smooth same as putting some oil in your skin but it’s NOT oily and sticky. It has a powdery feeling while I’m gently rubbing it in my skin. I’m amazed.

Note: As they said with primers – a little goes a long way. And this primer does.


maybelline baby skin pore eraser consistency

The TRIAL

To start of, here is my face without putting
anything yet. I have a combination skin and
discoloration plus an acne scars if you look closer.

My face becomes oily easily and I’m hoping the
primer would help with this matter.
I also sweat easily, so let’s see…


maybelline baby skin pore eraser trial


Photo below is after I have put on foundation. I used my Loreal Infallible matte foundation (wrong foundation, I should’ve not used a matte finish. For a dry and combination skin – it created lumps hehe) It also looks whiter because I became darker when we were on a vacation lol.

maybelline baby skin pore eraser trial01
This is my make-up look during new year’s eve. I’m done putting make up by 9:30 pm.
If you look closer, you can see my face started to become oily on the forehead, a little on the nose and
on the cheeks. I think it’s been only 30 minutes when we took the photo.

maybelline baby skin pore eraser trial02

Update:

Photo below is after we took photoshoot. It’s just an hour past. It’s 10:30 in the evening. We’re just inside our house with an airconditioned room.
I already looked haggard and looks like my sweat moved my foundation on my forehead (note that I didn’t swipe off any sweat during that time). I also started to look pale, maybe because my foundation is not my skin tone anymore.

maybelline baby skin pore eraser update
(Photo from my canon dSLR)  
maybelline baby skin pore eraser update01
 (Photo from my Vivo V5 Phone)


Verdict:

Based on my first experience with the Maybelline’s Baby Skin Pore Eraser, I did love how it felt on my skin when you gently rub it on your face because it did have a smooth finish. I didn’t see much effects on my make-up staying longer because like my usual make ups, in just an hour, I looked like I have done an exercise haha!

I am not closing my judgment with the Maybelline’s baby skin for this is just the first trial. I have to test it for several times because this also happens to me first time trying their fit me concealer (but I LOVE THEM NOW) or maybe I just have put up the wrong foundation for my type of skin. I should try a dewy finish foundation next time.

Let me know what you think on the primer I used below!
HAPPY NEW YEAR!


Tags: HMN8.1

Tuesday, January 2, 2018

4 important points when working with box primitive modeling in 3ds Max

4 Points to remember when modeling box primitives.

1. If you’re using a reference photo or you set-up a virtual studio for finer modeling, do not fill in the entire part of the image (for example the body) with one whole box then refine it later by adjusting its vertices,  it is highly advisable to constructively complete the image bits by bits(for example sleeve first then extend or extrude it to complete the body)


 2. After creating a simple box shape, convert it to editable poly so you can further modify the simple box shape, complete the totality of the image with extrude, bevel, and so on, depending on your current selection at the command panel -> Modify tab, you can also modify the object shape by just using simple tools like the move, rotate and scale tools at the main toolbar.

3. Use Edges to fine tune a shape and to give volumes, at the Command Panel -> Selection -> Edge, Edge is very useful when adding volumes, to make curvy like shapes, just by selecting a single edge then clicking the ring button at a selection rollouts combined with Connect button under Edit Edges rollout it will add an intersecting line at the selected edges then you can scale it to give smooth curve look.

4.Lastly add modifiers (for example if you want to bent the whole image) use Bend modifier,

>>Tips on,

Pair Objects
When working with objects that should be in pair (for example hands or pair of boots), just use the mirror tool in the main toolbar to clone it in instance or copy options.

Accidental selection

[Spacebar] or by clicking selection toggle on the Status Bar at the bottom, it will securely lock on the desired selection.